Introduction to LogicLab – Getting Started
Getting started
In this page we’ll see what to do in order to set up and execute a new project for LLExec Ubuntu x64 OSADL after having downloaded LogicLab and LLExec from the liks above.
Install procedure – LLExec
- Start your Ubuntu x64 machine (this procedure has been tested on Linux Ubuntu x64 18.04.3 LTS)
- Download LLExec installer for Ubuntu x64 from the link above
- Extract LLExec Ubuntu installer in your /home directory on the Linux machine, then launch LLExecUbuntuInstaller.sh with the following parameters: ./LLExecUbuntuInstaller.sh OSADL_FULL.
LLExec will be installed into default path /data/plc (an OSADL kernel Patch 5.0.21-rt16 will be installed along with LLExec).
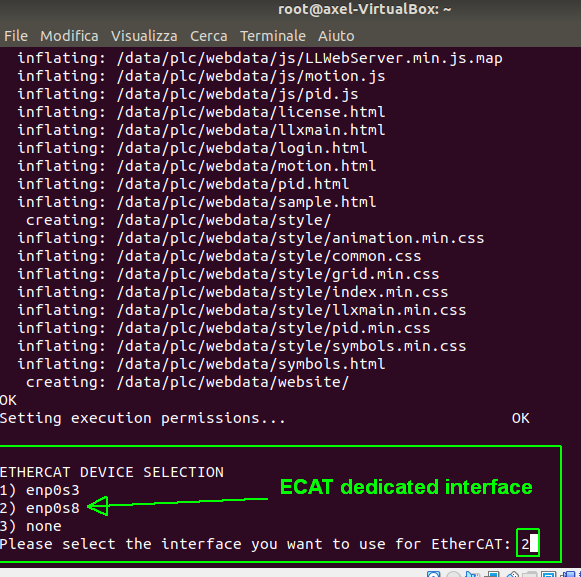
When asked if you wish select an EtherCAT device, you need an additional Ethernet board to reserve as EtherCAT master. EtherCAT network is required for the “Motion demo”, it is not required for “Getting started” and “Basic demo”. - A system switch off / switch on, is required after succesful installation.
- At system start up, make sure that the correct kernel version is executing: go to grub menu and select kernel version 5.0.21-rt16
- Start LLExec with command “./runLLExec.sh” from /data/plc folder (or from your installation folder) with root privileges.
- The demo version is fully operational but lasts only for 120 minutes; you can restart the 120 minutes demo by restarting your system; if you wish to remove the time limit, you can register a license.
- For furhter details, please check out the “How-to for LLExec_Ubunutu_x64” guide on Axel wiki pages.
Install procedure – LogicLab
- Close all the applications running on the system
- Run AxelAutomationSuite exe after having downloaded it from the link above
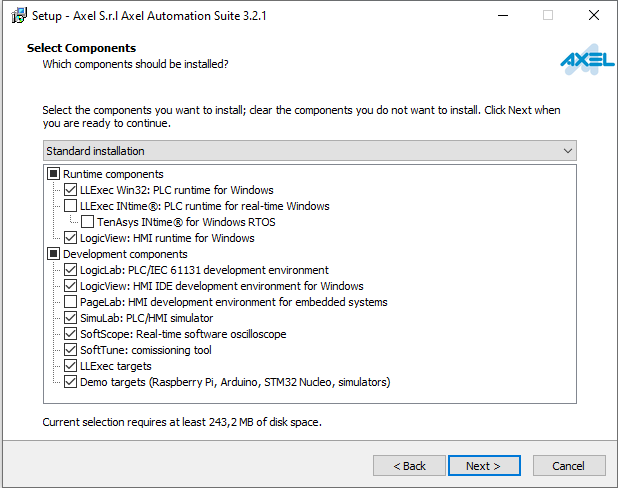
- Follow the instructions shown in the setup wizard.
It is preferable if you do a standard installation, but if you wish to select components, please, keep at least LogicLab, LLExec targets and Demo targets. - In the start menu, under Axel PC tools folder, you should find LogicLab icon
First steps using the IDE
At start up, LogicLab allows the user to choose if create a new program or open an already existing one; for this example, we’ll be creating a new project:
- Launch LogicLab application
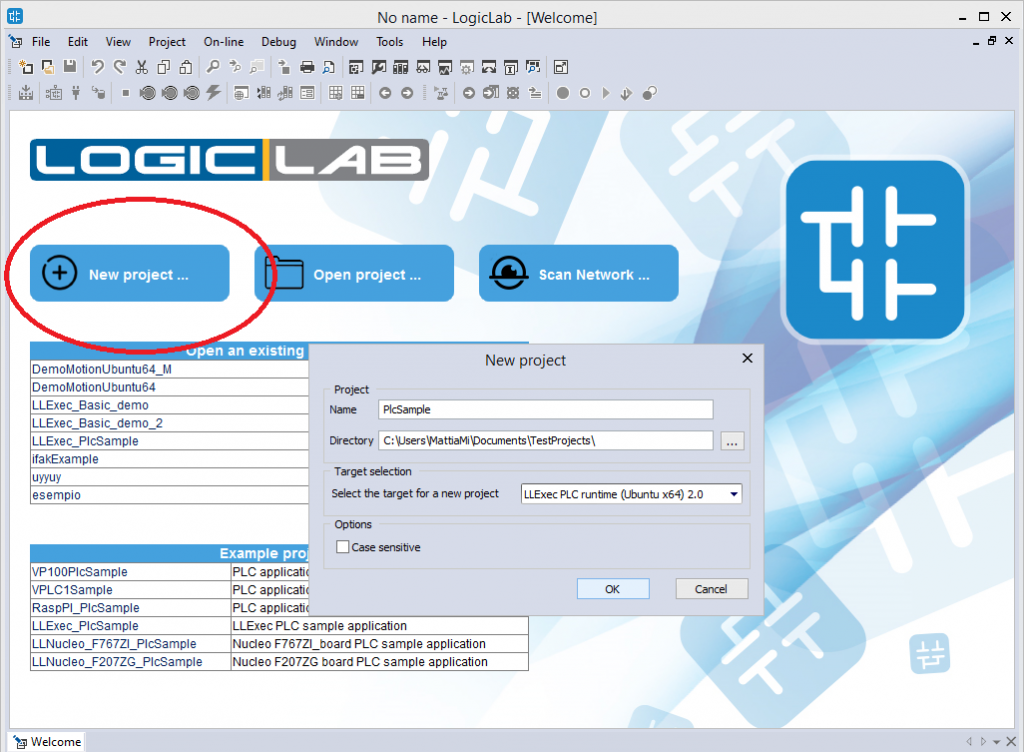
- From the welcome page, choose “New project…”
- A dialog will appear asking you:
– to insert the name of the project; notice that within the same folder there can’t be two projects with the same name
– to choose a destination folder for the project source file
– to specify the target device of this project; depending on the selected target device, the project will have specific resources and features. Notice that the available devices list is install-dependent, which means that different customized versions of LogicLab will have different available target devices.
– to choose if the project will consider elements with case sensitivity or not (this can be also changed inside the project) - For the current example we’ll create a project named PlcExample, saved in the default directory, for LLExec PLC runtime (Ubuntu x64) 2.0 device, with no case sensitivity.
- Confirm with the OK button
Create and assign a new program
The new project is created with already a program named “Main”, but for our example we’ll create a new one:
- To create a program, you can select from the menu Project -> New object -> New program, or use the context menu of the project tree by right-clicking a root element and selecting Add -> New program
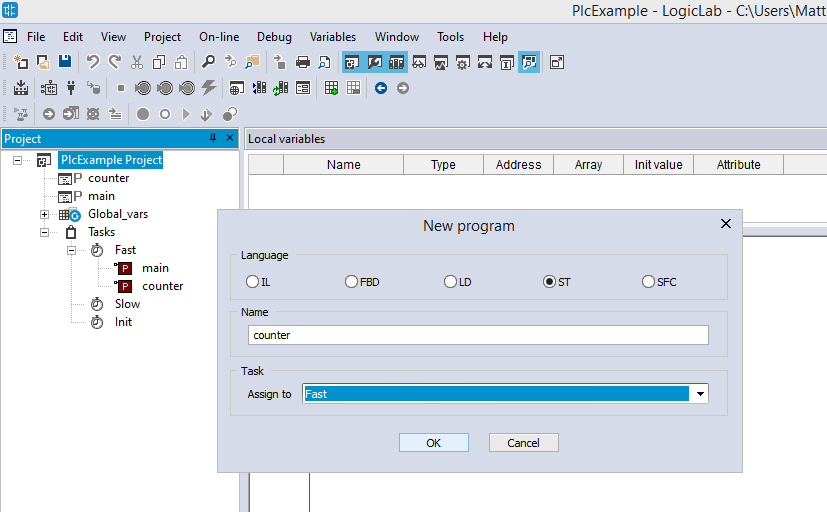
- A dialog will appear asking you:
– to select the desired IEC language for this program; each language has a different editor.
– to insert a name for this program; programs names must be different, considering also case sensitivity if enabled.
– to specify the task this program will be assigned to; you can choose to not assign this program to a task for the moment and do it later.
Notice that unassigned program will not be downloaded. To assign a program to a task in a second moment: right-click on the task -> choose Add program -> select the program from the list.
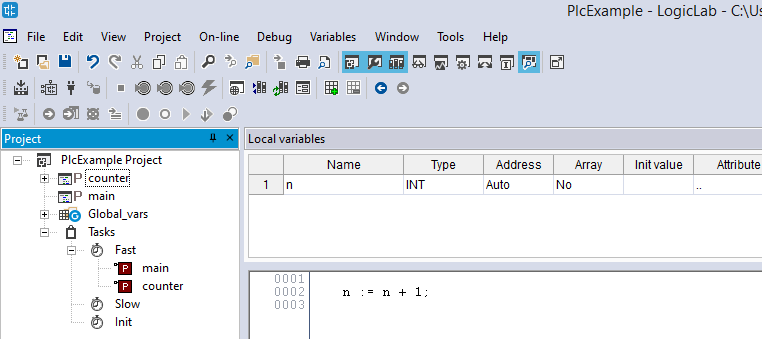
To unassign a program from a task: just select the program node under the task node in the project tree and delete it. - For the current example we’ll create a program for ST language, named “counter”, assigned to task fast.
- Confirm with the OK button
Edit the program code
The main elements of a program are the variables editor and the code editor.
To create a new local variable: open the program by double-clicking it in the project tree, then select menu Variables -> Insert
As you can see, the variables editor, allows to user to specify several attributes of the variable; for now, let’s just create a variable with name “n” and type “INT”.
To edit the program code, just place the cursor inside the code editor and enter your code; for our example we’ll make a counter, so let’s write “n := n + 1;”
Connect to the target
- Be sure LLExec is running on your Ubuntu machine.
- Choose from LogicLab menu bar On-line -> Set up communication…
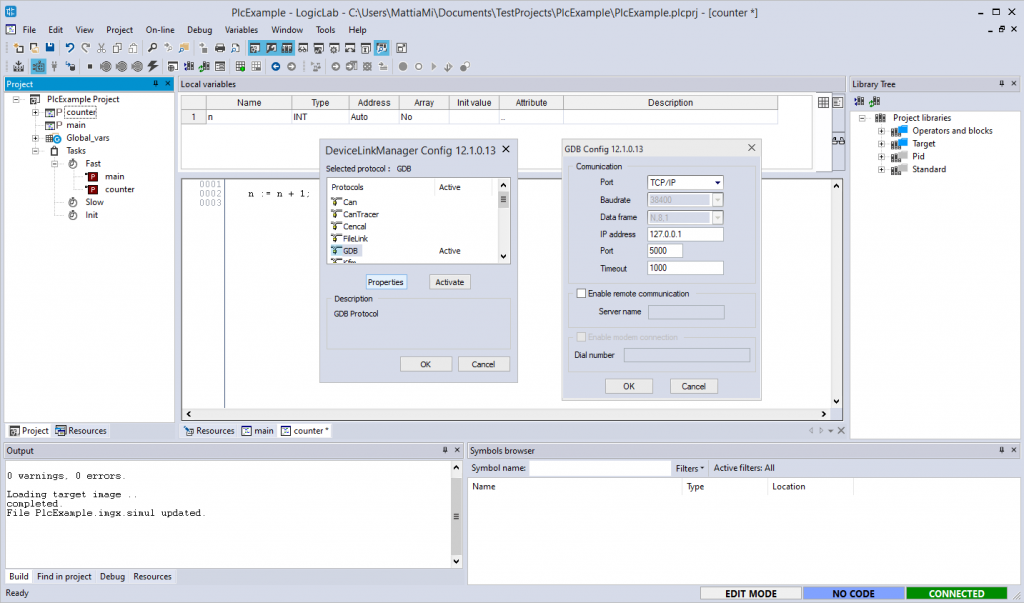
- A dialog will appear to let you choose the communication protocol; GDB is already selected, do not change it.
- Click the properties button: a dialog will appear to ask you the details of the connection; just insert the IP address of your Ubuntu computer (the one where LLExec is running)
- Confirm both dialog with OK button.
- Choose from LogicLab menu bar On-line -> Connect
- LogicLab should now be connected; you should see in the right-bottom border of LogicLab window the information CONNECTED and NO CODE (meaning that there is no code currently running on LLExec).
Compile, download and verify
To compile the project, select from menu bar Project -> Compile or simply press the shortcut F7.
In the output window you should see 0 warning and 0 error messages.
To download the project, select from menu bar Project -> Download or simply press the shortcut F5.
A progress bar will appear to indicate the status of the download; a dialog may appear to warn you that variables values will be resetted and asking your confirmation to proceed.
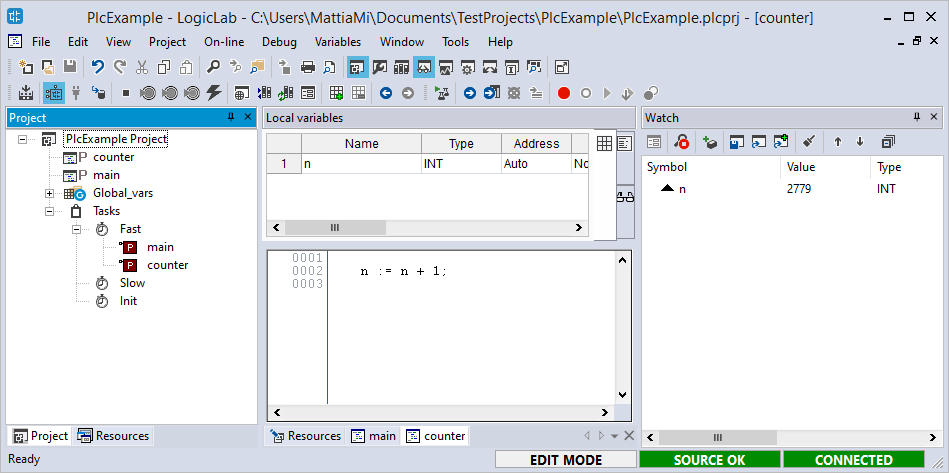
After the download you should see in the right-bottom border of LogicLab window the information CONNECTED and SOURCE OK.
To verify your code effectiveness, you can use the watch window, select the variable you wish to check (in our example the variable “n”) and select from menu Debug -> Add symbol to watch or simply press the shortcut F8.
You will now see, inside the watch window, the variable “n” and its value changing. The speed of the counter is related to the task frequency; if you assign the same program to the task slow, you’ll see the value of variable “n” raising slower.


